How do I configure Wiz Integration?
Requirements
- The API URL for your instance:
- Ex. "https://api.<region>.app.wiz.io/graphql', "
- The Token URL:
- ex. "https://auth.app.wiz.io/oauth/token',
- The Wiz API Client ID
- The Wiz API Client Secret
Permissions
- A NopSec user with the permissions of:
- Integrations.read
- Integrations.write
- We require the WIZ API to have access to do the following
-
Required permission(s)
Get Report Download URL and Status
read:reportsRerun Report
create:reportsGet Report Names
read:reportsCreate Vulnerabilities Report
create:reportsPull Vulnerability Findings
read:vulnerabilitiesUpdate Vulnerabilities Report
update:reportsCreate Issues Report
create:reportsUpdate Issues Report
update:reportsPull Issues
read:issuesCreate Inventory Report
create:reportsUpdate Inventory Report
update:reportsPull Cloud Resources
read:resources
Steps to configure
- Create Wiz API and capture the Client ID and Client Secret
-
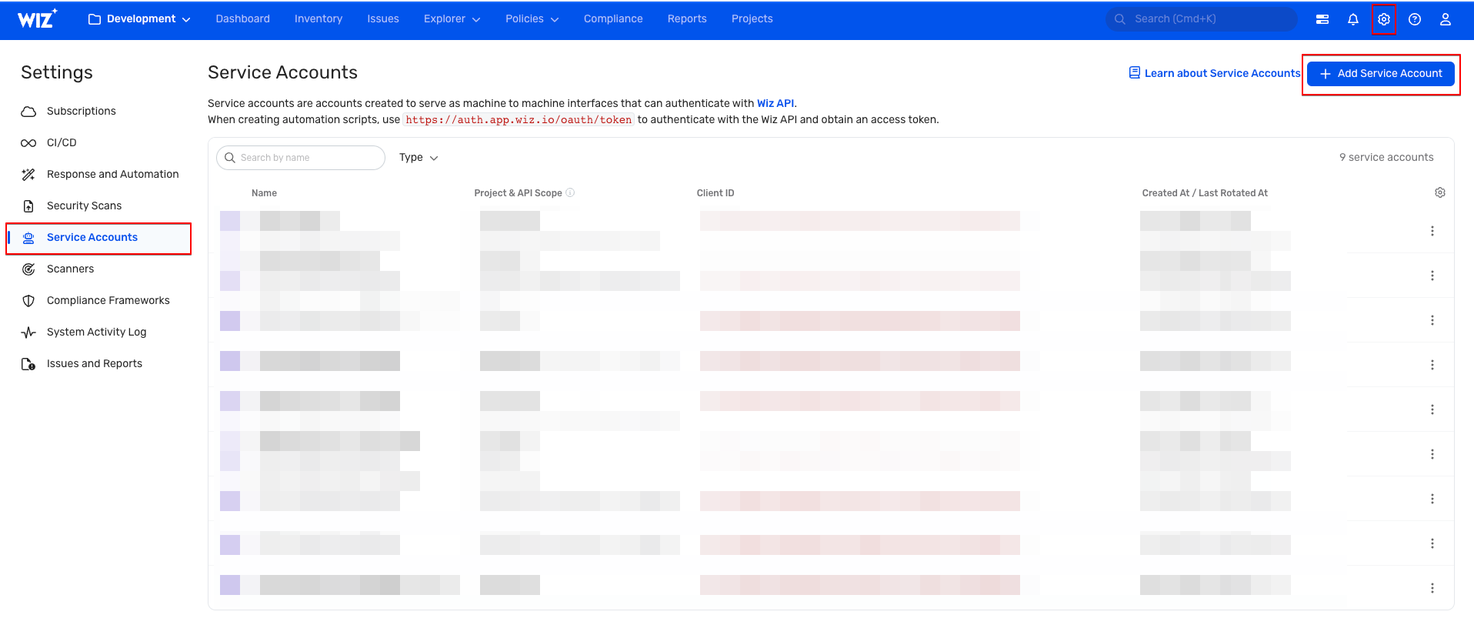
Login to Wiz with the Project Admin role.
-
Click the Settings icon available at the top-right of the page.
-
On the Settings page, Click Service Accounts from the left menu.
-
Click the Add Service Account button.

-
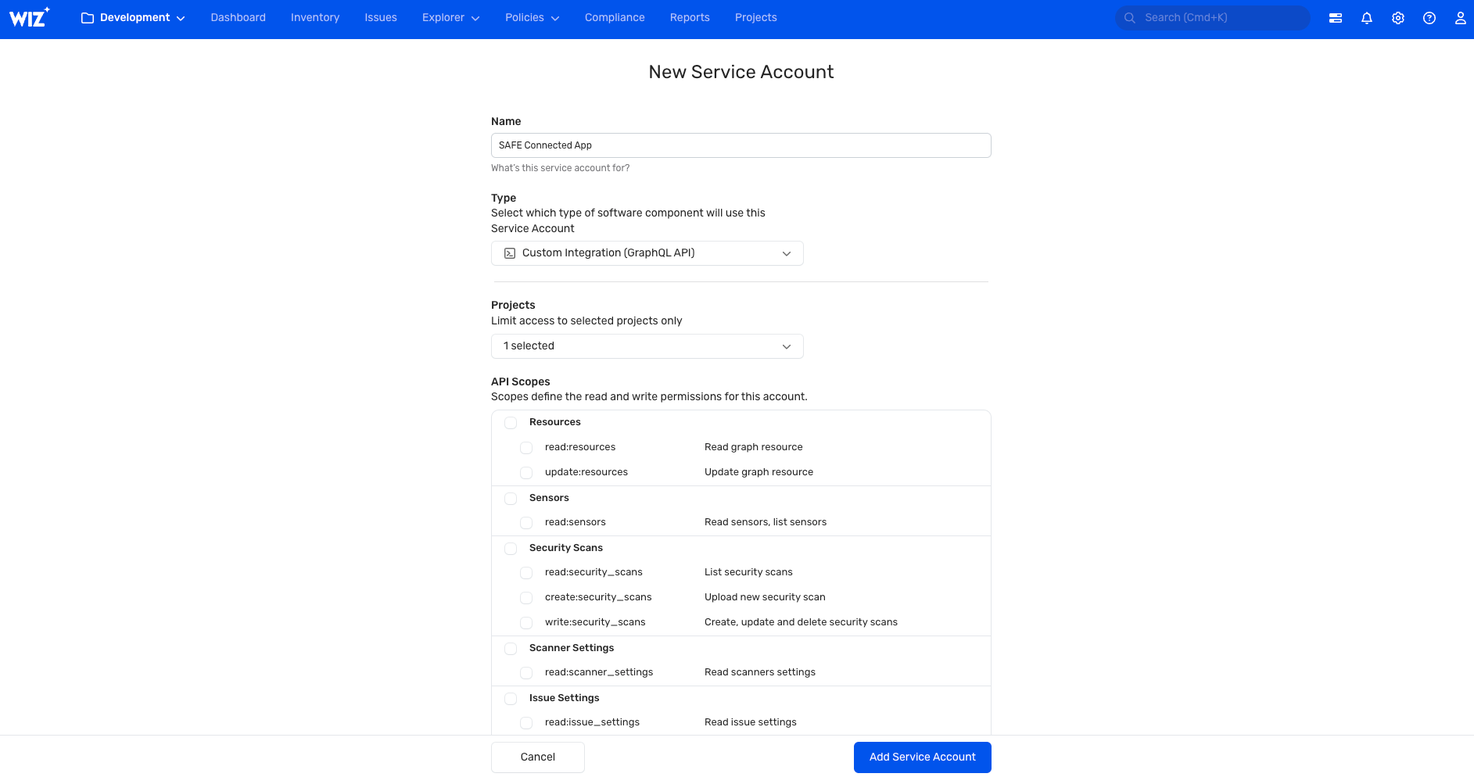
Enter a Service Account Name.
-
Select the Custom Integration(GraphQL API) option from the Type drop-down.
-
Select a Project from the drop-down. You must select the projects with the resources you wish to sync the issues.
-
Select all of the permission above in the API Scopes.
-
Click the Add Service Account button at the bottom.

-
The system displays the ClientID and Client Secret.
-
Copy and save the Client ID and Client Secret to use while configuring Wiz in SAFE.
Alternatively, you can copy and paste the Client ID and Client Secret in their respective fields on the Wiz configuration page in SAFE.
For more details, refer to Add a Service Account.
-
- Open NopSec and click on Integrations
- Click on Vulnerability Tab
- Find Wiz
- Click on Add Integration
- Give your integration a connection name
- Place the URL
- Place the Token URL
- Paste the Client ID
- Paste the Client Secret
- Click Save and Connect
- Click on Sync History Tab
- Refresh every few minutes to see the updated status
- The first sync is only scheduled to retrieve 24 hours worth of data
- Once task is completed, ie. FINISHED then you may go to Prioritize and see your results